Chart of Welding Symbols
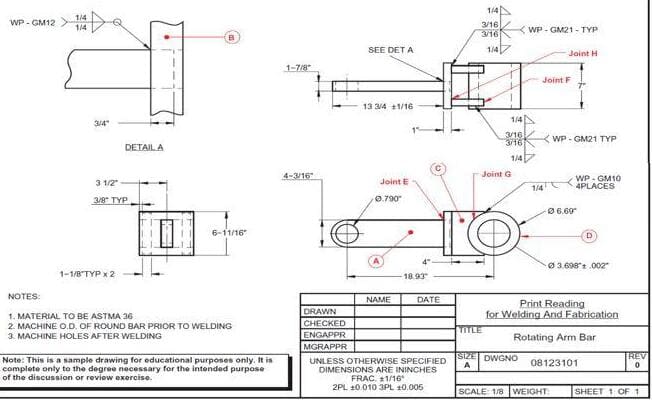
Welding symbols provide a system for communicating complex fabrications requirements from the design stage to the welders executing the work. We can say, a welding symbol is a shorthand version of a welder’s/ inspector’s/ engineer’s instruction manual . It provides comprehensive details about the type of weld, its size, its location and other relative information to make a quality weld.
What is a Welding Symbol?
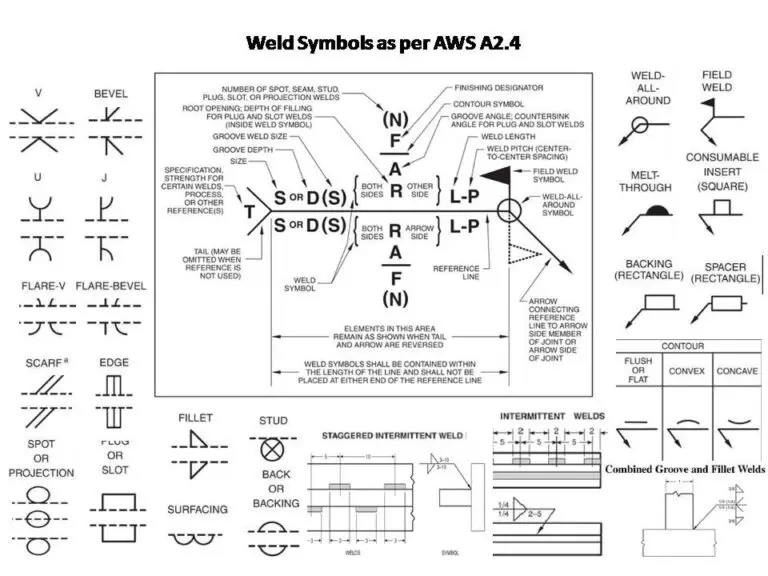
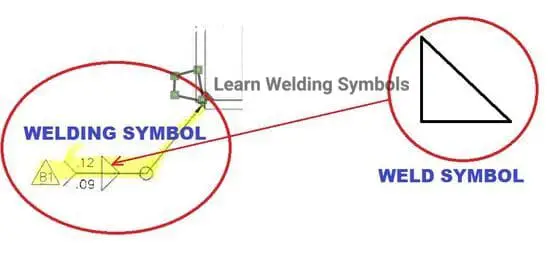
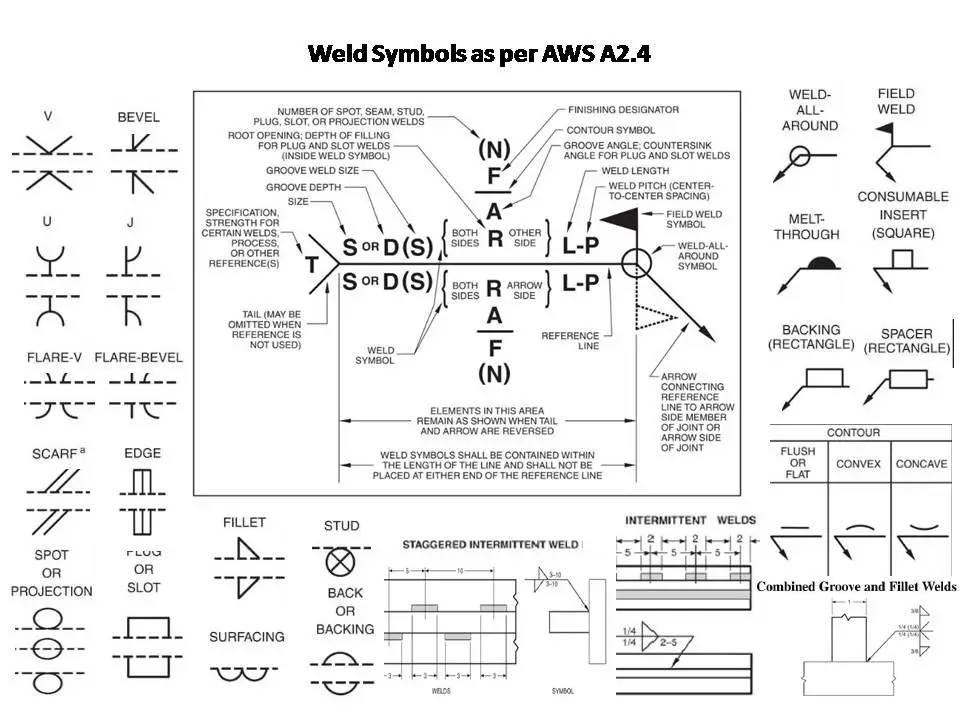
A welding symbol consists of several elements to convey specific instructions. Here are the key components:
- Reference Line: This is the foundation of the welding symbol. It is a horizontal line that anchors all other symbols.
- Arrow: This connects the reference line to the joint location that is to be welded.
- Tail: This optional component extends from the opposite end of the reference line from the arrow and contains supplementary information such as the welding process, specification, or other references.
- Weld Symbols: These are specific shapes placed on the reference line to indicate the type of weld. There are two types of weld symbols:
- Primary or basic weld symbols.
- Supplementary weld symbols.
- Dimensions and Other Data: The size, length, pitch, number, and other details of the weld are indicated by numbers and mentioned either on reference line or in the tail section.
- Finish Symbols: Finish symbols or also called Contour symbols specify the method to be used for shaping the weld.
Interpreting the Chart of Welding Symbols
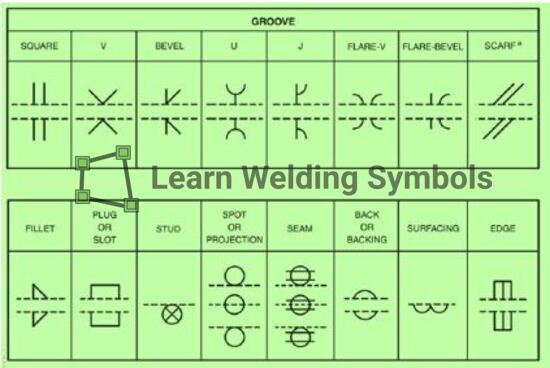
Understanding the chart of welding symbols involves interpreting these key elements. Here are the main types of welds and their corresponding symbols:
- Fillet Weld: This is the most common type of weld, used when joining two surfaces at a right angle. The symbol looks like a right triangle.
- Groove Weld: This type of weld is used when a joint needs to be completely penetrated. The symbol varies, depending on the geometry of the groove.
- Plug or Slot Weld: These welds are used to connect overlapping members, one of which has holes (for a plug weld) or slots (for a slot weld) in it. The symbol looks like a rectangle with a semi-circle on top.
- Spot or Projection Weld: These welds are used for joining two overlapping components, typically in sheet metal work. The symbol is a circle.
- Seam Weld: This weld is used for joining or sealing the seams of two overlapping components. The symbol is two parallel lines.
- Back or Backing Weld: This weld is used to add strength and quality to the other weld types. The symbol is a semi-circle that has been filled in.
- Surfacing Weld: This weld is used to add layers of material to a surface for strength or resistance to wear. The symbol is a straight line.
- Edge Weld: This weld is used to join the edges of two surfaces. The symbol is a square.
Click here to Download Full size Chart of Welding Symbols.
Click here to buy this product from AMAZON
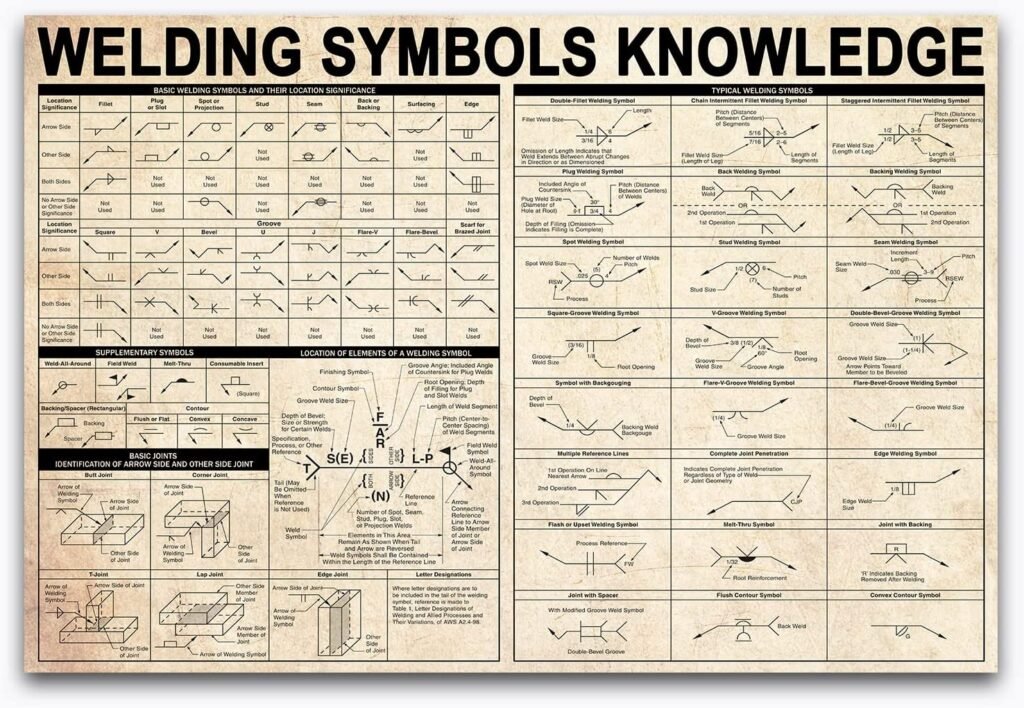
The placement of these symbols on the reference line also indicates where the weld is to be applied relative to the joint. If it appears on the lower side of the reference line, the weld is to be made on the joint’s arrow side. If it appears on the upper side, the weld is to be made on the other side of the joint. If it appears on both sides, a weld is required on both sides of the joint.
Conclusion
Mastering the chart of welding symbols is vital for anyone involved in or studying welding. By understanding these symbols, welders can accurately interpret design plans and consistently produce high-quality work. While it might seem complex, with practice, understanding the chart of welding symbols can become second nature.
